DIY | Lino Cut Alphabet Stamps
Since taking a print making class at uni last semester, I've become a bit obsessed with printing. My particular favourite technique is relief printing - carving into lino or wood to make a design, then covering the surface with ink and making a print onto paper. I really liked making woodcuts as I found that the harder surface, with more resistance, gave more precise marks with my carving tools and a cleaner print. Lino is fun too, and if you buy an easy-carve type. you can easily and quickly make simple designs. At uni we used industrial presses to transfer the ink on the design cleanly onto paper, but similar results can be achieved at home - I have a Japanese bamboo baren that I use to apply pressure onto larger wood/lino cuts.
If you make a lot of relief prints, this tutorial will probably seem like a really hack version of print making for you - but my main aim was just to introduce the idea of lino cuts to those who mightn't have gotten to make them before. If you have any tips to share, do comment!
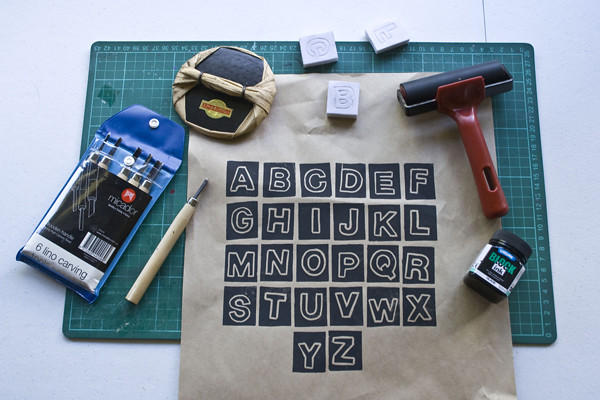
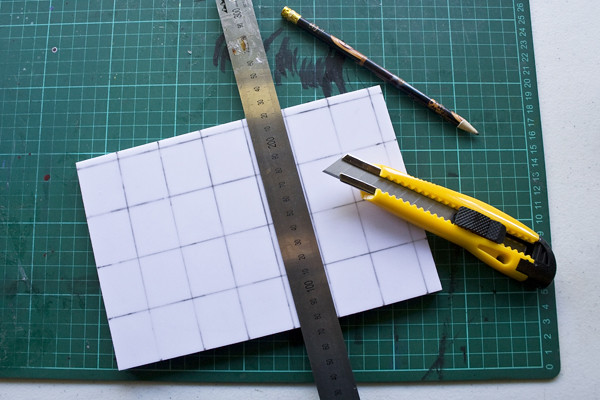
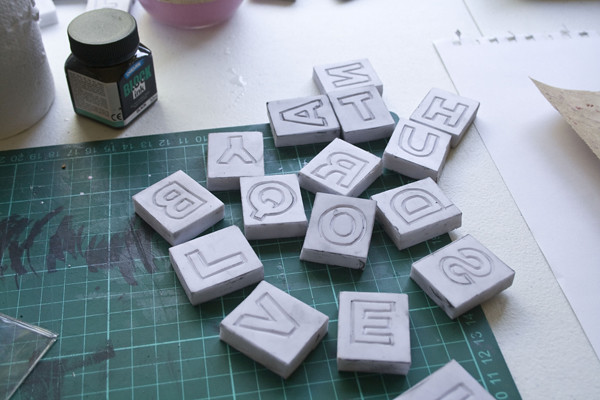
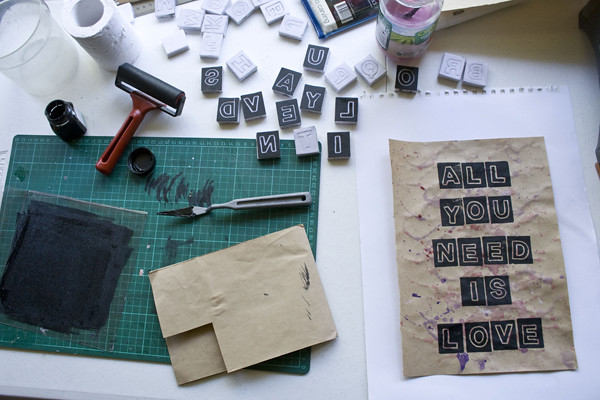
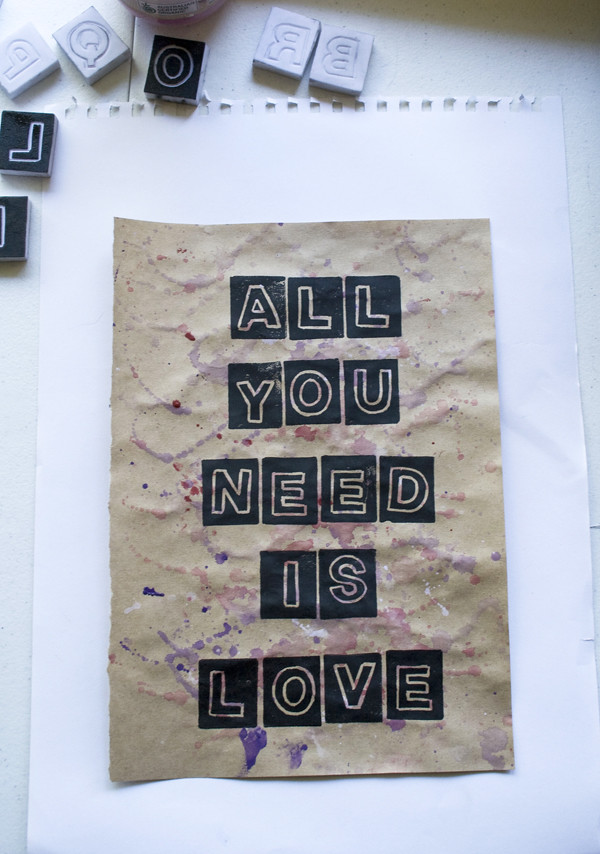
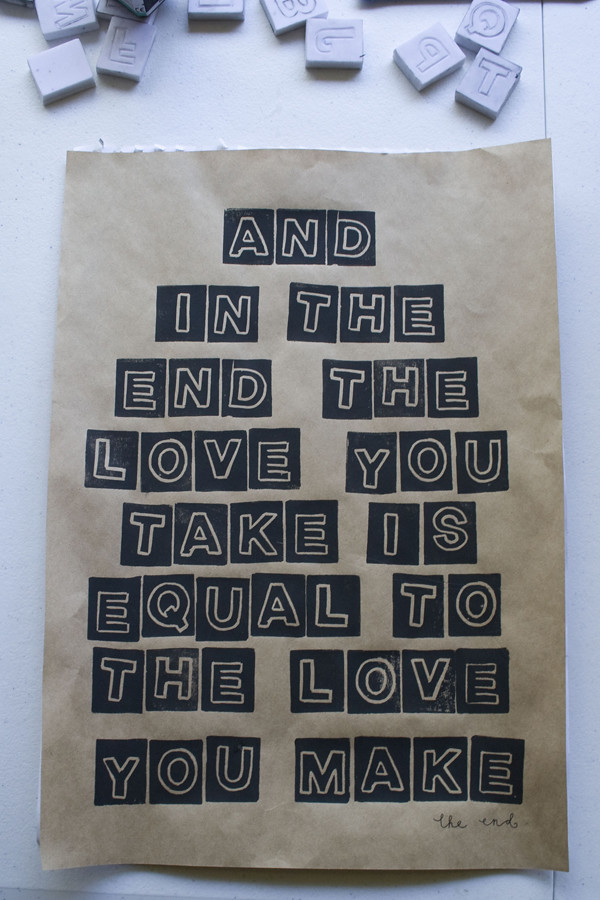
I made a bunch of prints with different designs for this subject, some with hand-drawing lettering, all with a Beatles lyric theme. I've wanted to make my own set of alphabet stamps for a while. I worked out how many letters I could fit onto my piece of lino (I could fit 28 squares - each 3cm x 3.5cm - so 26 letters and 2 left over squares, it's good to have leftovers incase you make a mistake). Alternatively you could cut out half this amount and make each stamp double sided. I ruled out lines across my piece of lino, marking them in with a pencil and then carefully cut out the blocks using a sharp utility knife.
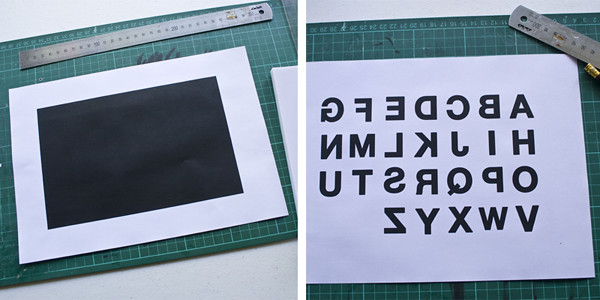
Because I wanted the letters to be precise, I decided to use a print out of the letters as a template and not do them freehand (maybe another project). First, I made a large flat black rectangle shape in Photoshop and printed that on one side of a piece of A4 paper with my laser printer. On the other side of the A4 sheet I printed my alphabet (created in Photoshop, making sure that each letter would fit easily within the 3cm x 3.5cm squares). The NUMBER ONE rule of making prints using lettering is to MAKE SURE THAT ALL OF YOUR LETTERS/WORDS ARE CARVED BACKWARDS. I can't stress this enough. I think everyone eventually has an experience of painstakingly carving a lino/wood cut only to realise once you've printed it that your letters/words are the mirror image of what they should be and there's nothing you can do but start again. Massive frustration.
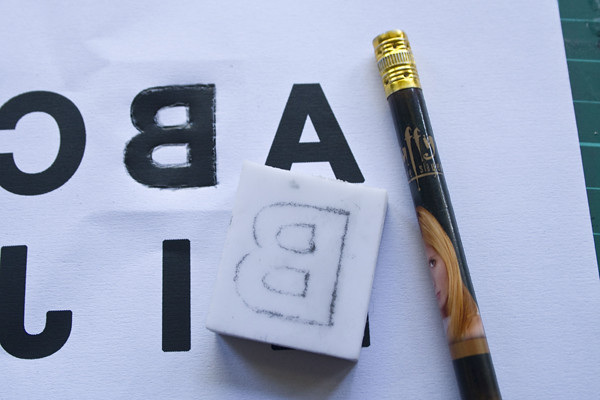
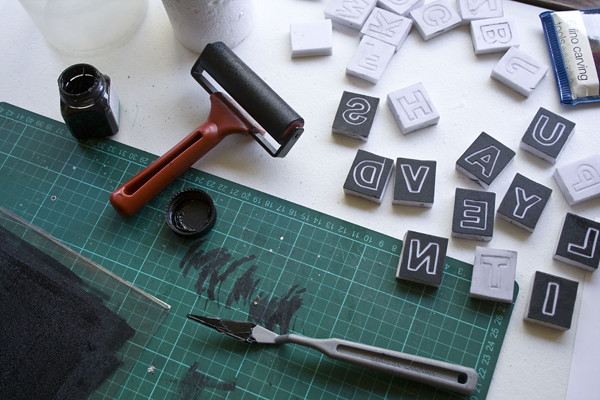
Using a laser printer, the black colour on the paper comes off easily if you rub it - this works well if you want to transfer an image onto another surface. I put each lino square underneath the corresponding letter on the paper and drew over the letter on the paper with a pencil - the letter shape is lightly transfered to the lino through the paper. I then drew over the letter on the lino with my pencil so that the shape to carve would be clearer.
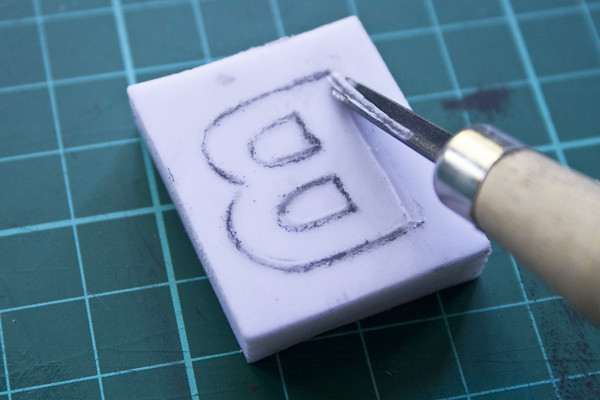
I don't really have any major tips for carving the lino except to practice, be patient and work slowly. I'm definitely no pro. Round shapes are harder to carve than straight lines, but it can be done. When I was first making woodcuts my hands had little cuts all over them from using my tools badly. Always point the blade of the tool away from yourself. It is easy for the tools to slip and for you to ruin your design, take your time and get to know the materials. I wanted my letters to have a black area around them, but you could carve the white area around each letter instead if you prefer. Of course, where you carve will be the white space and where you don't will be what gets inked.
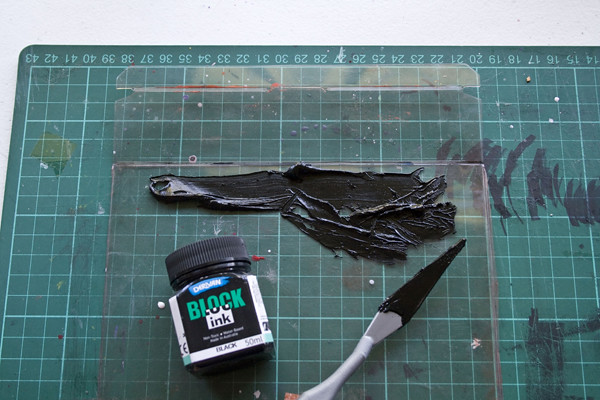
Once my letters were all carved, I applied an amount of ink (about a teaspoon) along the edge of my piece of plastic sheet using my palette knife, then using my roller, rolled the ink out onto the plastic. Don't just roll back and forth - put your roller into the ink, pick it up, let it spin, then roll it back, and repeat until the ink covers the plastic sheet evenly. At uni we were taught to 'listen to the ink' as you're rolling it and you'll know when there's too little or too much ink on the plastic sheet, I love the hiss it makes - otherwise, do a test print with an amount of ink on your lino to get an idea of whether you need to apply more ink. Always use less ink than you need, you can always add more.
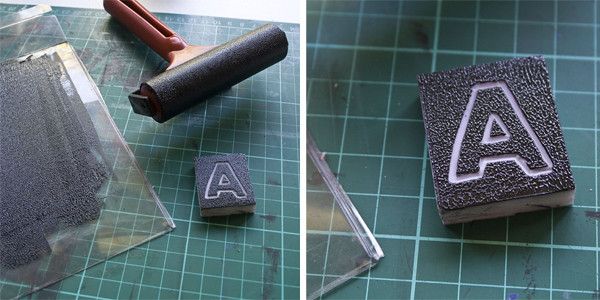
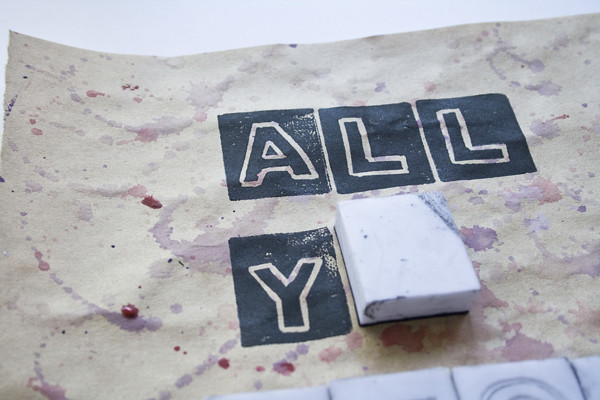
Once you've got a good amount of ink coverage on your lino cut, you just press the lino cut onto paper. You'll need to apply a lot of pressure so that the ink is evenly transferred - if you've made a print that is larger than my tiny blocks, using a baren to apply pressure might work better than just using your hands. If you've applied too much ink, the lino can move around a bit and smudge the ink. When using a press at uni, I would usually place my print on top of my inked wood/lino cut before rolling it through the press, but when I have small pieces of lino, I find it much easier to do it the other way around. I do kind of like the sketchy, imperfect quality of hand pressed prints though (like below).
If you're a
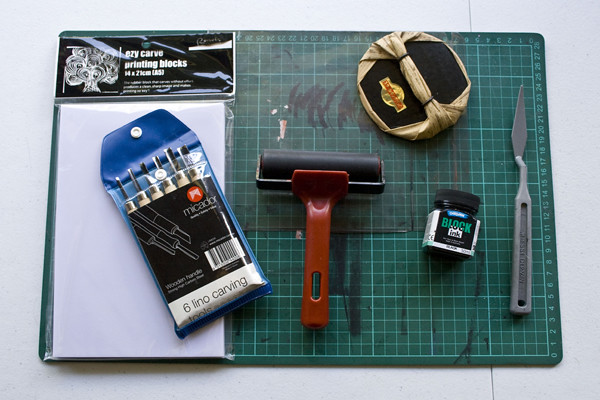
Tools I use:
+ Easy-carve lino (I used a 14cm x 22cm block)
+ A stanley knife
+ Lino cutting tools (especially the small V shaped tool for making precise cuts)
+ A hard rubber paint roller (not the soft foam sort)
+ Block printing ink (as these are often expensive, you can buy a block ink medium extender to add to good quality acrylic paints to make them the right viscosity for making block prints)
+ A palette knife (I have a small plastic one, but an ordinary plastic knife can do the job)
+ A piece of thick, flat plastic for rolling paint on (you can buy these, but I use a piece of flat clear plastic packaging I found, you could also use a flat piece of glass or metal).
Happy print making!
